Adding a button to a table in Gutenberg, WordPress (without plugins)
Here is a little tutorial on how to add buttons to your Gutenberg Tables in WordPress.
You can see an example below.
| Software A | Software B | Software C | Software D | Software E | |
|---|---|---|---|---|---|
| Review | Review link | Review link | Review link | Review link | Review link |
| Rating | ⭐⭐⭐ | ⭐⭐⭐⭐ | ⭐⭐⭐ | ⭐⭐ | ⭐⭐⭐⭐⭐ |
| Price | $100 | $150 | $120 | $100 | $110 |
| Pros | Good, smart | Good, fast | Good, nice | Good, design | Good, easy |
| Link | 777 |
How to add a button in your affiliate tables, in 5 steps
Step 1: design your button, outside the table
I explained the steps carefully in the video. But Step 1 is to add a new button to your page, outside the table. But before you insert it into the table, you have to design the button. I would recommend the following steps:
- Make the text Bold
- Add the URL you want it to link to
- Go to the block options:
- Add a background color that stands out
- Change Typography to S-size (which is small, and make the button fit the table better)
- Go to Dimensions, and change the padding to 1 (bottom and top, left, and right)
- Go to Radius and change the radius to 5px, to make it look like the button below
Step 2: Copy the HTML of the button
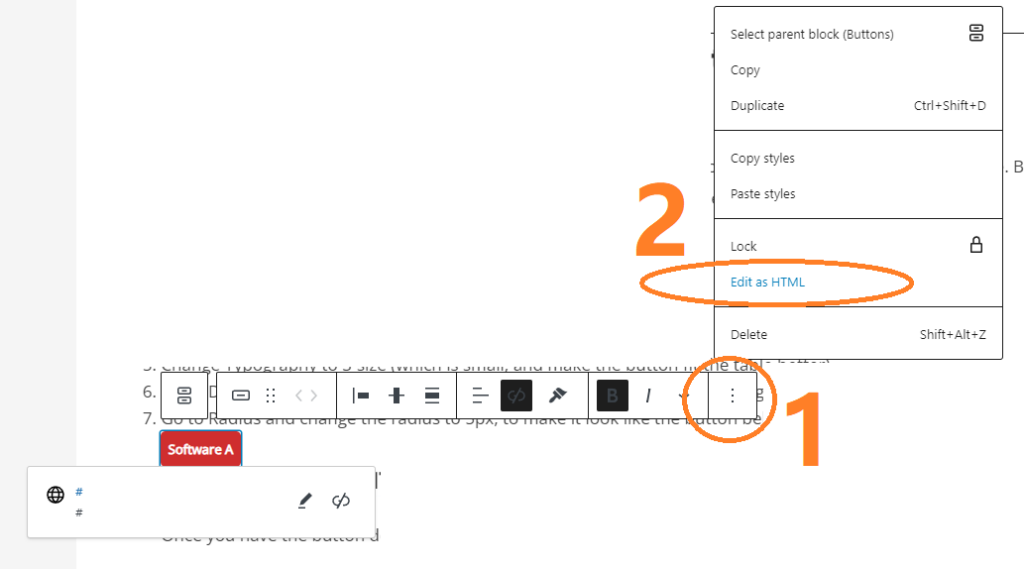
Once you have the button designed to your liking, you need to copy the HTML of the button. You do this by selecting the button, and clicking on the 3 dots in the menu that appears. Once you clicked the 3 dots, you see more options and select Edit as HTML.

When the HTML appears, select all the HTML, and Copy.
Step 3: Paste the HTML into the right place in the table.
Once you have the HTML copied from the button, you need to insert it into the Table.
The only way I figured to do this, is by editing the HTML of the table. But to find the place you need to add this particular HTML code, I normally add an easy to find number or name. In my case, I use the number 777
When you edit the HTML of the table, you simple do Ctrl+F and search for 777.
Select the number, and replace it with the HTML you just copied.


